Rendering Newark-on-Trent
House Rendering Newark-on-Trent | Exterior Refurbishment
A complete exterior scheme needs more than a choice of render. It needs a decision about the features that stay, the different walls beneath the surface and the order in which repairs and alterations happen. House rendering in Newark-on-Trent can bring several elevations together visually while retaining appropriate differences in their construction. The work should leave a clear record of what has changed, rather than treating the house as one undifferentiated area to cover.

On this page
Start with what the house is keeping
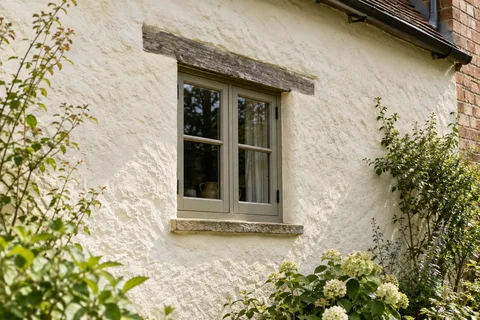
An original brick band, a stone surround or a well-proportioned sill can contribute more to an elevation than a perfectly uniform colour. Identify those retained features before measuring the rendered area. Where previous repairs have blurred their edges, the proposal should explain whether the work is intended to recover a clearer detail or simply finish neatly beside it. Neither outcome should be assumed from a short quotation headed exterior rendering.
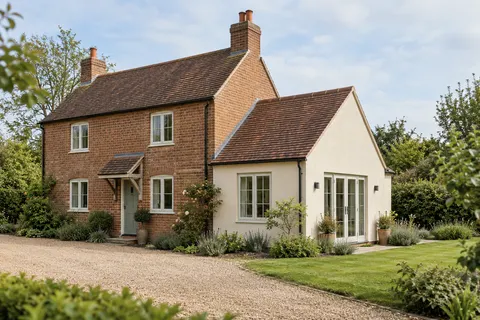
The relationship between the front and rear deserves the same attention. A later extension may be deliberately expressed as a separate part of the building, or its colour may be chosen to relate to the original house. Matching every visible surface is not necessarily the most coherent result. The important thing is that the intended relationship is shown and approved before the work reaches the point where changing it requires removing newly applied material.
Where a property is listed or falls within a designated area, the retained features and proposed changes may form part of a consent or planning discussion. Newark's wider heritage context does not establish the status of your house. Use the actual address and appropriate council information, then keep any relevant approval and drawings with the scope supplied to contractors. A later substitution of texture or detail may need further consideration.
- Scaffold and protection Windows, doors, paths and planting are covered; downpipes, lights and satellite brackets come off.
- Old finish tested or removed Failed render is removed; the survey decides whether any sound areas can remain within the specified system.
- Masonry repairs and beads Cracked bricks and open joints are repaired; corner, stop and base beads are fixed.
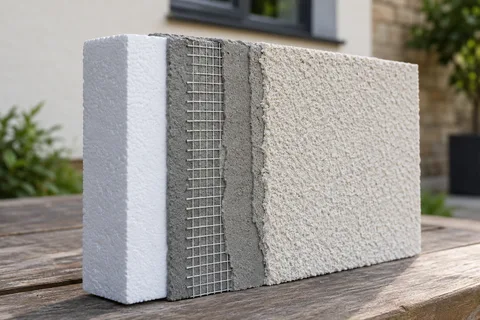
- Base coats Sand-and-cement scratch and float coats, or a manufacturer basecoat with mesh.
- Finish coat A painted, scraped or thin-coat coloured finish, applied in suitable weather.
- Fittings and junctions Fittings are refixed through the new surface; sills, roofline and abutments are sealed.
The usual order of work. The survey and the chosen products decide the actual steps.
Treat the original house and additions according to their construction
Under one roof there may be traditional masonry, modern blockwork and areas rebuilt around altered openings. The survey should distinguish them, together with existing render and paint. A common finish colour does not establish that the same material build-up suits every background. The person specifying the work needs to explain how the different substrates and their junctions will be handled.
Lime rendering is relevant where traditional materials need a compatible approach. Silicone and monocouche offer other possibilities for suitable backgrounds. A sand-and-cement specification may include a separate decorative stage. Rather than ranking these names in the abstract, compare the proposal for each part of the building: what remains, what is removed, what repairs are needed and what the finished system consists of.
The article on insulating a modern rear addition is useful where only the newer part is being upgraded thermally. That situation needs a planned transition to the original house. It should not lead to an older facade receiving an unsuitable treatment merely because one contractor would prefer the same build-up everywhere. The distinction can be documented clearly without making the exterior look disjointed.
Establish the condition beneath existing coverings
A whole-house scheme often includes surfaces with different histories. One elevation may have been painted repeatedly, another patched after replacement windows, and another left largely unchanged. Record the known work and identify where investigation is needed. A limited trial can help answer a specific question about removal or attachment, but it should not be treated as proof that every other wall is identical.
Where pebbledash is being removed, the revealed masonry may affect the replacement specification. Where the defects are local, repairs can be described within the larger contract without automatically stripping sound surrounding material. Keep an inspection stage after preparation if important details will otherwise be hidden. The owner should have a chance to understand significant findings and approve a revised scope before the next layer conceals them.
Uncertainty is easier to manage when the quotation explains it. A provisional preparation allowance should identify the assumption, the method of checking it and the basis for any variation. That is more useful than a reassuring but undefined promise to include all necessary work. The cost guide helps organise these comparisons, including items supplied by other trades and the access period needed to complete the agreed stages.
| Decision | What it controls |
|---|---|
| Retained features | The appearance and extent of new work |
| Background specification | Suitable treatment for each part |
| Related alterations | Order of roof, window and fitting work |
| Handover record | Future identification and maintenance |
Arrange the surrounding work in a workable order
Window replacement, rainwater repairs and roof-edge alterations can all affect the facade. The project should identify which must be completed before rendering and which fittings are reinstated later. A new sill needs to relate to the proposed finished wall, while a pipe bracket needs a suitable fixing arrangement. These are small components with a large influence on whether the exterior functions as intended.
If external wall insulation is included, those interfaces must follow the designed system. If it is render-only work, the same fittings still need deliberate treatment. Do not leave a newly finished wall dependent on an unresolved gutter leak or a service enclosure that somebody has yet to agree to move. The necessary specialist tasks should have named responsibilities and a place in the programme.
Access must also suit the complete scope. A courtyard or lower roof can complicate reaching an elevation that appears straightforward from the street. The contractor needs to assess the working arrangement, protection and route for materials. For an occupied house, explain everyday access needs so a practical arrangement can be agreed. A preferred completion date cannot replace suitable application conditions or the inspections needed before access is removed.

Judge the finished scheme as a building, then check its details
An approved sample establishes the intended colour and texture, but the completed exterior also depends on its proportions and boundaries. View it from the positions where the building is normally seen, then inspect the agreed junctions and smaller areas. The work around a sill, behind a reinstated pipe or at the edge of retained masonry belongs to the contract just as much as the broad central face.
At handover, retain the product references, relevant inspection records and maintenance instructions. Photographs taken during preparation can be valuable when the wall is altered later. The article on writing maintenance instructions explains a useful record for an owner. It should describe the actual installation rather than provide generic care advice for an unidentified material.
For a future small colour change or patch, those records may avoid treating the entire exterior as unknown again. Recolouring and individual-wall work remain separate options when appropriate. The Rendering Newark-on-Trent homepage links the different services so that the next decision can follow the condition and construction of the building, not an assumption that a complete-house project must always be repeated in full.
Common questions
Must the rear extension match the frontage exactly?
That is a design choice, not an automatic technical requirement. The two parts may need different compatible systems. Samples and agreed boundaries can help them relate visually while preserving the details and construction requirements that make their specifications different.
What should happen if stripping reveals unexpected repairs?
Pause at the agreed inspection point and review the findings against the specification. Any changed preparation or extent should be explained and approved through the contract's variation process before the replacement layers conceal the background again.
See housing and planning information for Newark-on-Trent and nearby places, including the source and geography behind each figure.